Introduction to WordPress Posts
Posts are the primary content type in WordPress, designed for regularly updated content like blog entries, news updates, and articles. Unlike pages (which are static and hierarchical), posts are chronological, categorizable, and appear in your site's RSS feed. Understanding how to create and optimize posts is fundamental to managing a successful WordPress website.
In this comprehensive guide, we'll walk through the entire process of creating posts in WordPress, from basic creation to advanced techniques that will help you publish professional-quality content in 2026.
Note: This guide applies to WordPress 6.5+ and works with both the Classic Editor and Block Editor (Gutenberg). We'll cover both methods so you can follow along regardless of which editor you prefer.
WordPress Posts vs. Pages: Understanding the Difference
Before diving into post creation, it's important to understand when to use posts versus pages:
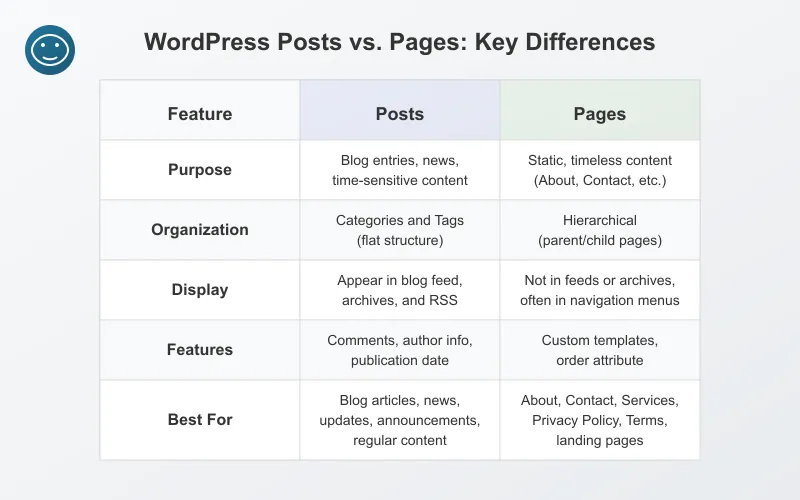
When to Use Posts:
- Blog entries and regular content updates
- News articles and time-sensitive content
- Content that should be categorized or tagged
- Content that should appear in your RSS feed
- Content that visitors might want to comment on
When to Use Pages:
- Static content like About, Contact, or Services
- Content that needs a hierarchical structure (parent/child pages)
- Content that should be accessible from the main navigation
- Content that rarely changes and should remain easily accessible
Step-by-Step Guide to Creating a Post in WordPress
Let's walk through the complete process of creating a post in WordPress, from accessing the editor to publishing your content.
Step 1: Access the WordPress Dashboard
- Log in to your WordPress admin area (typically yourdomain.com/wp-admin)
- Enter your username and password
- Click "Log In"
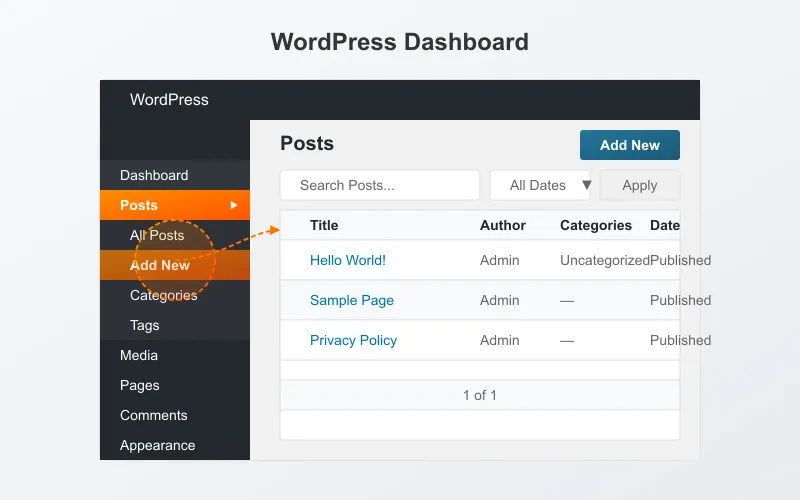
Step 2: Navigate to Posts
Once logged in, you'll see the WordPress dashboard. To create a new post:
- In the left sidebar, hover over "Posts"
- Click "Add New"
Alternatively, you can click on "Posts" and then click the "Add New" button at the top of the Posts screen.
Step 3: Add a Title
The first element of your post is the title. Click on the "Add title" field at the top of the editor and type your post title.
Tips for effective post titles:
- Keep titles under 60 characters for optimal SEO
- Include your primary keyword near the beginning
- Make it descriptive and engaging
- Use numbers or questions to increase click-through rates
Step 4: Add Content Using the Block Editor (Gutenberg)
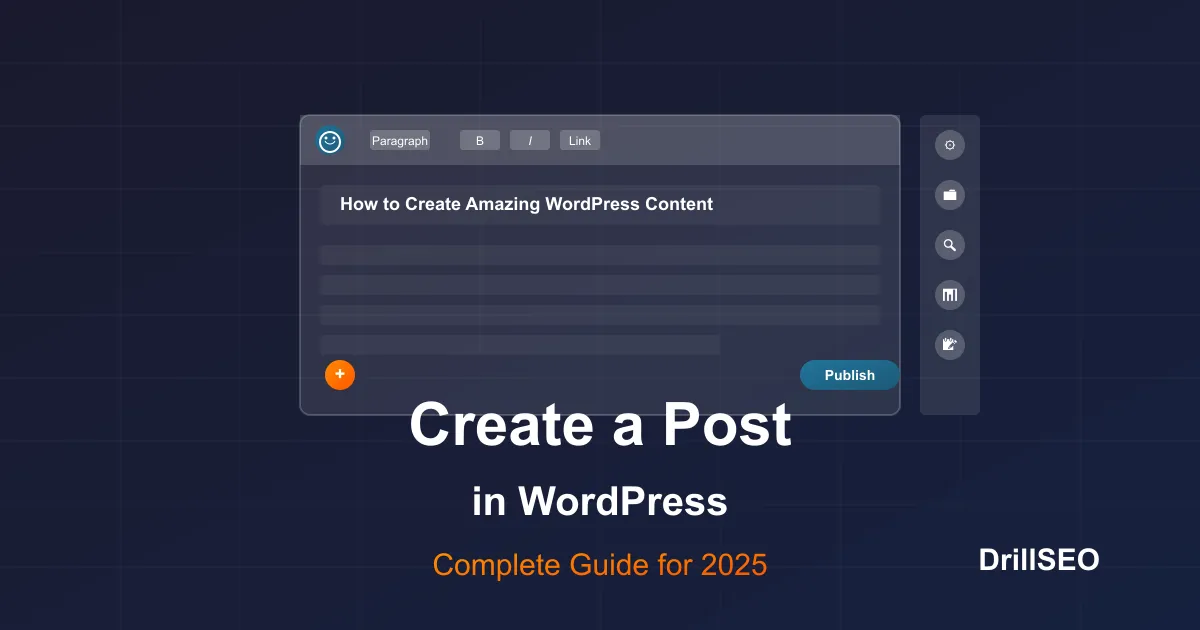
WordPress now uses the Block Editor (Gutenberg) by default, which provides a more visual and flexible way to create content.
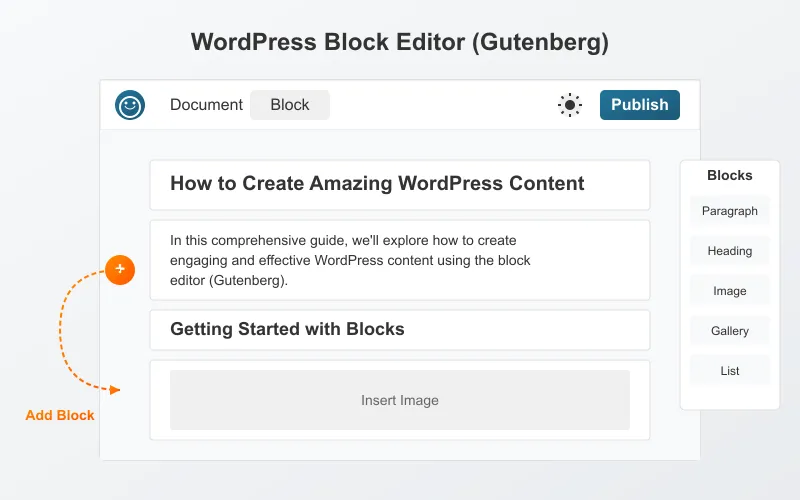
To add content:
- Click the "+" icon to add a new block
- Select the type of block you want to add (paragraph, heading, image, etc.)
- Add your content to the block
- Continue adding blocks to build your post
Common block types include:
- Paragraph: For regular text content
- Heading: For section titles (H2, H3, etc.)
- Image: For adding photos and graphics
- Gallery: For multiple images
- List: For bulleted or numbered lists
- Quote: For quotations
- Code: For code snippets
- Table: For tabular data
- Columns: For multi-column layouts
- Embed: For videos, tweets, and other external content
Using the Classic Editor (If Preferred)
If you prefer the Classic Editor, you can install the "Classic Editor" plugin from the WordPress repository. Once activated:
- Navigate to Posts > Add New
- You'll see a familiar interface similar to a word processor
- Use the toolbar to format text, add media, etc.
Step 5: Add Featured Image
A featured image (also called a post thumbnail) represents your post visually in various places on your site.
- Look for the "Featured Image" panel in the right sidebar
- Click "Set featured image"
- Upload a new image or select one from your media library
- Click "Set featured image" to confirm
Pro Tip: For optimal display across devices, use featured images with a 16:9 aspect ratio (e.g., 1200×675 pixels) and keep file sizes under 200KB for faster loading.
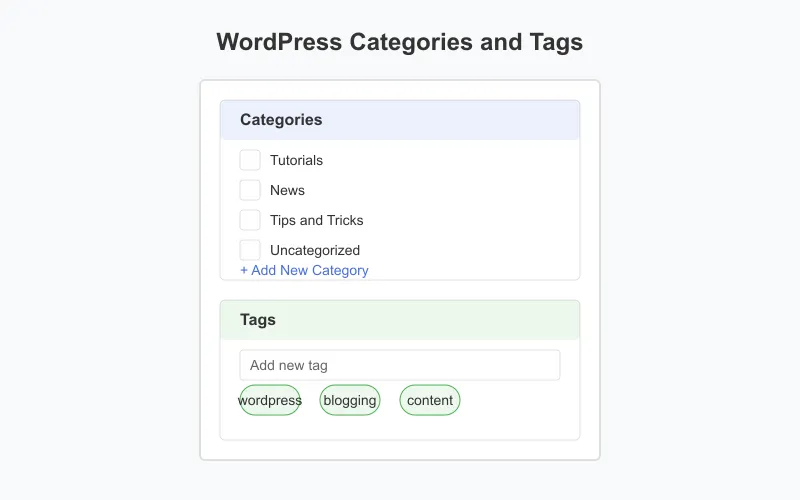
Step 6: Add Categories and Tags
Categories and tags help organize your content and make it easier for visitors to find related posts.
Categories:
- In the right sidebar, find the "Categories" panel
- Select existing categories or click "Add New Category"
- Enter a name for your new category
- Optionally select a parent category
- Click "Add New Category"
Tags:
- In the right sidebar, find the "Tags" panel
- Enter tags separated by commas
- Click "Add" or press Enter
Step 7: Set Permalink/URL
WordPress automatically generates a permalink (URL) based on your post title, but you can customize it:
- Look for the permalink below your post title or in the Document settings
- Click "Edit" next to the permalink
- Modify the slug (the part after your domain name)
- Click "OK" or "Save"
Best practices for permalinks:
- Keep them short and descriptive
- Include your primary keyword
- Use hyphens to separate words
- Avoid special characters, numbers, and dates if possible
Step 8: Configure Additional Settings
Depending on your theme and plugins, you may have additional settings available:
Excerpt:
The excerpt is a short summary of your post that appears in archive pages, search results, and RSS feeds.
- Find the "Excerpt" panel in the sidebar
- Write a concise summary of your post (usually 1-2 sentences)
Discussion Settings:
Control whether comments and pingbacks are allowed:
- Find the "Discussion" panel
- Check or uncheck "Allow comments" and "Allow pingbacks & trackbacks"
Author:
If you have multiple authors on your site, you can change the post author:
- Find the "Author" panel
- Select the appropriate author from the dropdown
Step 9: Preview Your Post
Before publishing, it's important to preview how your post will look on your live site:
- Click the "Preview" button in the top-right corner
- Select "Preview in new tab" to open the preview in a new browser tab
- Check how your post looks and make any necessary adjustments
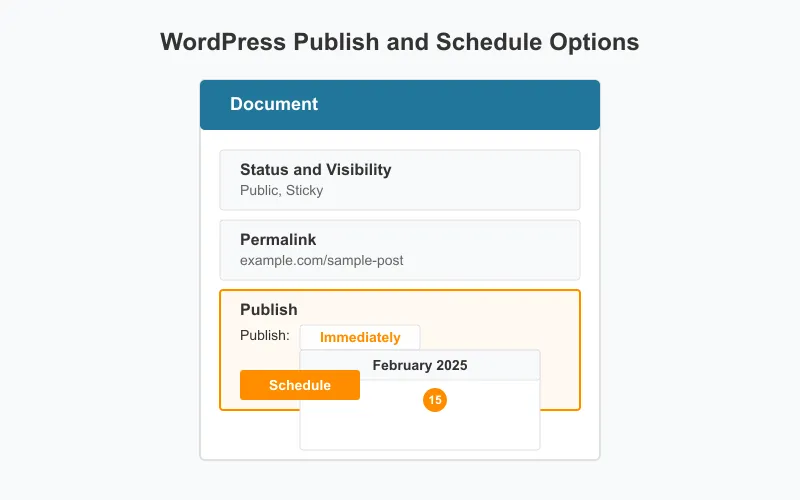
Step 10: Publish or Schedule Your Post
When you're ready to make your post live:
To publish immediately:
- Click the "Publish" button in the top-right corner
- In the pre-publish check panel, review your settings
- Click "Publish" again to confirm
To schedule for later:
- Click the "Publish" button
- Next to "Publish:", click "Immediately"
- Set your desired date and time
- Click "Schedule" to confirm
Advanced Post Creation Techniques
Once you've mastered the basics, consider these advanced techniques to enhance your WordPress posts:
Using Reusable Blocks
Reusable blocks allow you to save content blocks for use in multiple posts:
- Create a block or select multiple blocks
- Click the three dots in the block toolbar
- Select "Add to Reusable blocks"
- Give your block a name and save
- To use it again, click the "+" icon and look under "Reusable" tab
Creating Custom Layouts with Columns
Create multi-column layouts for more engaging content:
- Add a "Columns" block
- Select your desired column layout (2, 3, etc.)
- Add blocks within each column
- Adjust column widths by dragging the dividers
For longer posts, a table of contents improves navigation:
- Install a Table of Contents plugin (like "Easy Table of Contents")
- Structure your post with proper H2, H3, etc. headings
- The plugin will automatically generate a TOC based on your headings
Optimizing Images for Web
Properly optimized images improve loading speed and SEO:
- Resize images to the appropriate dimensions before uploading
- Compress images using tools like DrillSEO Image Compressor
- Add descriptive alt text for accessibility and SEO
- Consider using WebP format for better compression
Using Post Formats
Some themes support post formats for different types of content:
- Look for "Format" in the Document settings
- Select the appropriate format (Standard, Aside, Gallery, Video, etc.)
- Your theme will display the post differently based on the format
SEO Best Practices for WordPress Posts
Optimize your posts for search engines with these essential SEO techniques:
Install an SEO Plugin
SEO plugins like Yoast SEO, Rank Math, or All in One SEO Pack provide tools to optimize your posts:
- Install and activate your preferred SEO plugin
- Configure the plugin settings according to your needs
- Use the plugin's post analysis tools to improve your content
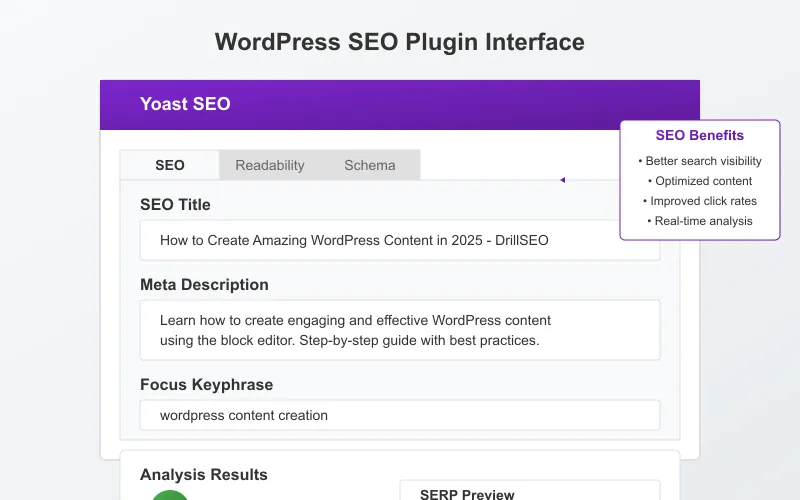
Optimize Your Title and Meta Description
With an SEO plugin installed:
- Scroll to the SEO section below your post editor
- Enter an SEO title that includes your target keyword
- Write a compelling meta description (150-160 characters)
- Preview how your post will appear in search results
Use Proper Heading Structure
Organize your content with a logical heading hierarchy:
- Use H1 for your post title (WordPress usually handles this automatically)
- Use H2 for main sections
- Use H3 for subsections within H2 sections
- Use H4 for further subdivisions if needed
Optimize Images for SEO
Make your images search-engine friendly:
- Use descriptive filenames (e.g., "wordpress-post-editor.webp" instead of "IMG001.jpg")
- Add alt text that describes the image and includes relevant keywords
- Consider adding captions for important images
Internal Linking
Link to other relevant content on your site:
- Identify opportunities to link to related posts or pages
- Use descriptive anchor text that includes relevant keywords
- Aim for 3-5 internal links per post
Troubleshooting Common Issues
Here are solutions to common problems you might encounter when creating posts:
Editor Not Loading Properly
- Solution 1: Clear your browser cache and reload
- Solution 2: Temporarily disable plugins to identify conflicts
- Solution 3: Switch to a default theme to check if your theme is causing issues
Formatting Issues
- Solution 1: If you're copying content from elsewhere, use the "Paste as text" option
- Solution 2: Try selecting problematic content and converting it to a different block type
- Solution 3: Use the "Code Editor" view to identify and fix HTML issues
Images Not Displaying
- Solution 1: Check if the image was properly uploaded to the media library
- Solution 2: Try re-inserting the image
- Solution 3: Verify that the image path is correct in the HTML
Post Not Appearing on Homepage
- Solution 1: Check if the post is published (not draft or scheduled)
- Solution 2: Verify that the post isn't set to "Private" or "Password Protected"
- Solution 3: Check your Reading Settings to ensure posts are displayed on the homepage
Conclusion
Creating posts in WordPress is a fundamental skill for anyone managing a website. By following this guide, you'll be able to create professional, well-optimized posts that engage your audience and perform well in search engines.
Remember that the key to successful content creation is consistency and quality. Regularly publishing valuable content using the techniques outlined in this guide will help you build a successful WordPress site in 2026 and beyond.
Frequently Asked Questions
Can I edit a post after publishing it?
Yes, you can edit a published post at any time. Simply go to Posts → All Posts, find the post you want to edit, and click "Edit." Make your changes and click "Update" to save them.
How do I delete a post?
To delete a post, go to Posts → All Posts, hover over the post you want to delete, and click "Trash." To permanently delete it, go to the Trash, hover over the post, and click "Delete Permanently."
Can I create posts with the WordPress mobile app?
Yes, WordPress offers mobile apps for iOS and Android that allow you to create and edit posts on the go. The apps include most of the functionality of the web editor, including the ability to add media, categories, and tags.
How do I create a sticky post that stays at the top of my blog?
In the Document settings panel, look for the "Stick to the top of the blog" option and check it. This will keep your post at the top of your blog page regardless of when newer posts are published.
Can I embed videos in my posts?
Yes, WordPress makes it easy to embed videos from platforms like YouTube, Vimeo, and others. Simply add an "Embed" block, paste the video URL, and WordPress will automatically embed the video player.